


Hello Realmers,
The Shattered Kingdom has resurged! After years of requests and months of development, the Shatters reconstruction is here at last. We’re beyond excited to release this next endgame experience and we hope you are too! (And we will have an event there once you get more familiar with the dungeon!).
To help you prepare for the challenge ahead, we’re going to break down the dungeon’s various parts so you know what you’re getting into.
The Shatters
Overview
Given the polarizing, love-it-or-hate-it nature of the original Shatters, we’ve strived to keep the spirit of the dungeon familiar while still massively expanding on its potential. With the small exception of Oryx’s Castle, the fully handmade structure of the dungeon is quite unique for Realm and is something we wanted to capitalize on. That extends beyond just gameplay to supplemental qualities too, such as deepened lore, environmental storytelling, and the most custom art of any dungeon.
The dungeon is still split into three acts with a boss for each, but those individual acts now feature completely different objectives, structures, and enemies. That last part has been especially increased, with remakes to all existing enemies and a dramatically increased unique enemy count (over 40, and that’s not even including the accursed).
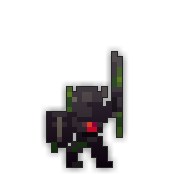
Speaking of the accursed, these fiends are an overarching mechanic throughout all three acts of the dungeon. Accursed enemies, marked by their twisted and purple appearance, are versions of normal mobs with heightened damage, aggression, and sometimes even totally unique tricks compared to their normal counterparts. Most notably, accursed enemies become a corrupt grave when killed, eventually resurrecting to fight another day. Every enemy has an accursed variant, and the area is never truly safe when they’re around.
Now let’s get into the details, starting with Act I!
Act I: The Derelict Village
You’ll begin on the outskirts of the castle, faced with the remains of commoner civilization. To enter the castle, you’ll first need to find and destroy eight Derelict Monuments throughout the island. Unlike the original, however, the locations of these monuments are randomized each time with dozens of possible positions. Furthermore, the map itself has multiple variants rather than being the same every time.

As you hunt, you’ll contend with many obstacles. Hollow humans roam the streets of the fallen village, complete with patrol routes allowing hunting parties to find you even in areas that appear safe at first. Stone enemies may blend in with harmless statues, only to awaken and strike. The untamed forest trails are a favorite spot of huntsmen eager to snipe you from the trees. And of course, the impenetrable Stone Idol poses a formidable, ever-present threat. Like a certain crustacean, he too patrols certain areas, forcing you to evade and change course. Keep your eyes peeled, and you may just be able to avoid his sight before he notices you.

You’re certainly not short on options for how to handle this open-ended area! Rushing can be a viable option if you’re confident, both alone and in groups. Navigating carefully and stealthily is a strong option too, as the mindless villagers have rather poor vision when unalerted, easily being avoided. Larger groups may favor a divide and conquer approach, fanning through the map efficiently and meeting up at the bridge. Whatever you roll with, we hope you’ll enjoy what we believe to be a very unique challenge for Realm!
Act I Boss: The Great Bridge

With the Derelict Monuments in pieces, the drawbridge lowers. Before you stands the Bridge Sentinel, the last bastion of the castle’s seal. Don’t let your memory of him fool you, he’s no shotgun-spewing statue anymore. This is a full-fledged boss fight, and perhaps the most agile opponent in the game.

As you duel with the noble knight, you’ll periodically weaken him enough to destroy the holy Paladin Obelisks on the bridge. The void’s influence will increase as you do so, changing the supplementary threats you have to deal with from spinning swords to hordes of the infamous blobombs. Learning the telegraphs and attack combos of this mobile opponent is critical! The most skilled of the realm’s heroes will find clever ways to shift through each pattern. Beware, even decoys cannot withstand the force of his blade.
Act II: The Royal Castle

Continuing your march into the castle, you must make your way through the courtyard and its welcoming committee before coming upon a diverging path. The castle is divided into four wings, with nine possible room types in any position, each with its own distinct challenges. Mathematically that makes for 3024 possible castle layouts, and that’s not including other randomized elements!

You may have seen a few spare sightings of mage and noble enemies in the village, but now they’re the main act. These enemies are more advanced than what came before them, most sporting several different attacks and some with unique abilities. Two notable examples are the Herald and Jester. The former is of little direct threat, but will sound an alarm with his trumpet when he notices you. This sound alerts all nearby enemies who have not yet been aggroed, potentially swarming you. Meanwhile, the Jester will deflect attacks with powerful, rapid blasts. Prudent players will only attack when ready, taking better control of the situation.
Your main goal in the castle is to power on the generators and awaken the Twilight Archmage. To do that, you must find a Source Generator in each castle wing, release its colored Untempered Magic, and guide this stray power to the dormant central generators through a string of Magi Conductors. Each color has its own properties and effect when nearby, which can be either positive or negative, and most must be pushed along by having at least one person standing nearby.

Enemies will attempt to sabotage your work by deactivating Magi Conductors, so make sure to defend them! Otherwise, you’ll be faced with a timer to repair the severed connection before your magic vanishes. And remember, you only need to activate three of the four generators to succeed and awaken the archmage. If you see a certain room type or color you find unfavorable, it may be in a party’s best interest to leave well enough alone and claim the other three wings!
Act II Boss: The Central Chamber

Power is restored, and so is the Twilight Archmage. This dusky menace is still a master of ice and fire but has graduated from a single shotgun to an array of advanced tricks. The fight is based around the three generators you activated, randomizing between fire and ice states at the archmage’s whims. These elemental states create a ratio system, dictating the next attack type. For instance, 2 fire generators and 1 ice generator will cause a “fire majority” attack. 3 fire generators and 0 ice generators would cause a “fire nuke” attack. The inverse is true for ice.

As you progress through the battle of mind and magic, the archmage will attempt to siphon your health at certain intervals, leaving the generators vulnerable. By attacking one, you can lock it into its current elemental state, gradually forcing the ratio of elements to your choices and influencing the rest of the fight. Each time you do this, the archmage will start to call upon his undying phoenixes based on the current elemental majority (and later both at once) to act as his health. You’ll need to shift attention to them in order to weaken the archmage and pierce his defenses!
Act III: The Grand Hall
You’ve pushed through the stronghold! All that remains now is the king’s last line of defense, his own royal guard. These are the kingdom’s elite, a family of enemies almost entirely exclusive to this section of the dungeon with vicious and varied attacks. Waves of slow marching knights who shift to dodge some attacks, thaumaturges with swarming spell casts, cavalry riders who can mount and dismount from their steed to attack as separate forces or together, and more dangers await to stop your crusade.

If you want an audience with the king, you must destroy the five Tablets of the Monarchy defending this last stand. They appear one after another when shattered, each in a random location, and the final two will both appear at once for extra strategic potential. The key here is to balance your attention between destroying the tablets and managing the endless onslaught of guards. Groups big and small may have their own ways of dealing with this before chaos completely takes over. Even a lone character can succeed, but you must be at the very top of your game. If you managed to solo the dungeon up to that point, though, you’re surely up for the challenge.
Act III Boss: The Throne Room

At long last, the Forgotten King. Simply getting this far proves you’ve succeeded where others have failed, but you haven’t won until his last breath. Don’t let his appearance fool you into assuming he’s incapable in combat. The Forgotten King is an unrelenting fight of two halves.

Initially, the monarch will move around the arena in several varied yet learnable patterns, all the while having his crystals form numerous patterns to navigate through. The king himself will visibly use multiple different stances. Specifically: Normal (attacks while moving), defend (stays stationary and repels you), reflect (attacks reactively only when shot himself), and chase (breaks from his movement path to directly pursue). Recognizing these and matching them to the ongoing phase variant is essential to learning and outsmarting the king.

The Forgotten King is a cunning foe, even able to see past your decoys if any tricksters try to pull a fast one. But beyond this point, you’ll have to find out for yourself. The king has more in store if you make it that far.
Loot
There’s much to gain in the Shatters! By venturing through, you’ll be able to get:
- The 3 original UT rings, which have been revised and buffed (with the exception of crown).
- T12/13 weapons, T6 abilities, T13/14 armors, and a much-improved chance at T6 rings.
- Many greater potions, no longer as stingy as the original.
- A fully reworked Twilight Archmage ST wizard set.
- 3 new UT armors, which are dropped by dungeon enemies and tablets.
- 3 new UT weapons, incredibly powerful tools which reward skillful play.
- 6 new UT abilities, 2 per boss, bolstering the movesets of many classes.
- A valuable reskin of the Ring of Decades, rewarding those who break monuments and tablets.
- Several new consumables to help you along, including the return of a long-forgotten legend.
- New sets of cloths, stylized after bosses and themes in the dungeon.
- And 3 exclusive pet skins!
We sincerely hope you’ll find the Shatters to be rewarding in both a literal sense and for the fun of the challenge. The whole team is very passionate about this dungeon and we’re thrilled to release this for Month of the Mad God after so long. Good luck!
OST:
Shatters soundtrack by 2Scallions: Ilja / @Slapjack (IGN: Howdiedew) and Jeroen / @Jerponymus
Support the artists by buying the soundtrack at Bandcamp:
Other Changes:
- Appetizer now drops The Shatters’ portal.
- No new items will drop in current Shatters Quest Chests.
Bug Fixes:
- Fixed Gardener and Appetizer’s resprite maps not showing.
- Fixed Shaitan’s HP scaling not updating appropriately when the fight begins.
- “Generous” Dungeon Mod will now provide a 10% chance (rolled per player) of dropping the Quest Chest.
- Fixed a bug that affected the probability distribution of Dungeon Mod “Souvenir II”.